Product SiteDocumentation Site

12.2. Virtualization

Virtualization is one of the most major advances in the recent years of computing. The term covers various abstractions and techniques simulating virtual computers with a variable degree of independence on the actual hardware. One physical server can then host several systems working at the same time and in isolation. Applications are many, and often derive from this isolation: test environments with varying configurations for instance, or separation of hosted services across different virtual machines for security.
There are multiple virtualization solutions, each with its own pros and cons. This book will focus on Xen, LXC, and KVM, but other noteworthy implementations include the following:

12.2.1. Xen

Xen is a “paravirtualization” solution. It introduces a thin abstraction layer, called a “hypervisor”, between the hardware and the upper systems; this acts as a referee that controls access to hardware from the virtual machines. However, it only handles a few of the instructions, the rest is directly executed by the hardware on behalf of the systems. The main advantage is that performances are not degraded, and systems run close to native speed; the drawback is that the kernels of the operating systems one wishes to use on a Xen hypervisor need to be adapted to run on Xen.
Let's spend some time on terms. The hypervisor is the lowest layer, which runs directly on the hardware, even below the kernel. This hypervisor can split the rest of the software across several domains, which can be seen as so many virtual machines. One of these domains (the first one that gets started) is known as dom0, and has a special role, since only this domain can control the hypervisor and the execution of other domains. These other domains are known as domU. In other words, and from a user point of view, the dom0 matches the “host” of other virtualization systems, while a domU can be seen as a “guest”.
Using Xen under Debian requires three components:
  • The hypervisor itself. According to the available hardware, the appropriate package providing xen-hypervisor will be either xen-hypervisor-4.14-amd64, xen-hypervisor-4.14-armhf, or xen-hypervisor-4.14-arm64.
  • A kernel that runs on that hypervisor. Any kernel more recent than 3.0 will do, including the 5.10 version present in Bullseye.
  • The i386 architecture also requires a standard library with the appropriate patches taking advantage of Xen; this is in the libc6-xen package.
The hypervisor also brings xen-utils-4.14, which contains tools to control the hypervisor from the dom0. This in turn brings the appropriate standard library. During the installation of all that, configuration scripts also create a new entry in the GRUB bootloader menu, so as to start the chosen kernel in a Xen dom0. Note, however, that this entry is not usually set to be the first one in the list, but it will be selected by default.
Once these prerequisites are installed, the next step is to test the behavior of the dom0 by itself; this involves a reboot to the hypervisor and the Xen kernel. The system should boot in its standard fashion, with a few extra messages on the console during the early initialization steps.
Now is the time to actually install useful systems on the domU systems, using the tools from xen-tools. This package provides the xen-create-image command, which largely automates the task. The only mandatory parameter is --hostname, giving a name to the domU; other options are important, but they can be stored in the /etc/xen-tools/xen-tools.conf configuration file, and their absence from the command line doesn't trigger an error. It is therefore important to either check the contents of this file before creating images, or to use extra parameters in the xen-create-image invocation. Important parameters of note include the following:
  • --memory, to specify the amount of RAM dedicated to the newly created system;
  • --size and --swap, to define the size of the “virtual disks” available to the domU;
  • --debootstrap-cmd, to specify the which debootstrap command is used. The default is debootstrap if debootstrap and cdebootstrap are installed. In that case, the --dist option will also most often be used (with a distribution name such as bullseye).
  • --dhcp states that the domU's network configuration should be obtained by DHCP while --ip allows defining a static IP address.
  • Lastly, a storage method must be chosen for the images to be created (those that will be seen as hard disk drives from the domU). The simplest method, corresponding to the --dir option, is to create one file on the dom0 for each device the domU should be provided. For systems using LVM, the alternative is to use the --lvm option, followed by the name of a volume group; xen-create-image will then create a new logical volume inside that group, and this logical volume will be made available to the domU as a hard disk drive.
Once these choices are made, we can create the image for our future Xen domU:
# xen-create-image --hostname testxen --dhcp --dir /srv/testxen --size=2G --dist=bullseye --role=udev

General Information
--------------------
Hostname       :  testxen
Distribution   :  bullseye
Mirror         :  http://deb.debian.org/debian
Partitions     :  swap            512M  (swap)
                  /               2G    (ext4)
Image type     :  sparse
Memory size    :  256M
Bootloader     :  pygrub

[...]
Logfile produced at:
	 /var/log/xen-tools/testxen.log

Installation Summary
---------------------
Hostname        :  testxen
Distribution    :  bullseye
MAC Address     :  00:16:3E:C2:07:EE
IP Address(es)  :  dynamic
SSH Fingerprint :  SHA256:K+0QjpGzZOacLZ3jX4gBwp0mCESt5ceN5HCJZSKWS1A (DSA)
SSH Fingerprint :  SHA256:9PnovvGRuTw6dUcEVzzPKTITO0+3Ki1Gs7wu4ke+4co (ECDSA)
SSH Fingerprint :  SHA256:X5z84raKBajUkWBQA6MVuanV1OcV2YIeD0NoCLLo90k (ED25519)
SSH Fingerprint :  SHA256:VXu6l4tsrCoRsXOqAwvgt57sMRj2qArEbOzHeydvV34 (RSA)
Root Password   :  FS7CUxsY3xkusv7EkbT9yae
We now have a virtual machine, but it is currently not running (and therefore only using space on the dom0's hard disk). Of course, we can create more images, possibly with different parameters.
Before turning these virtual machines on, we need to define how they'll be accessed. They can of course be considered as isolated machines, only accessed through their system console, but this rarely matches the usage pattern. Most of the time, a domU will be considered as a remote server, and accessed only through a network. However, it would be quite inconvenient to add a network card for each domU; which is why Xen allows creating virtual interfaces that each domain can see and use in a standard way. Note that these cards, even though they're virtual, will only be useful once connected to a network, even a virtual one. Xen has several network models for that:
  • The simplest model is the bridge model; all the eth0 network cards (both in the dom0 and the domU systems) behave as if they were directly plugged into an Ethernet switch.
  • Then comes the routing model, where the dom0 behaves as a router that stands between the domU systems and the (physical) external network.
  • Finally, in the NAT model, the dom0 is again between the domU systems and the rest of the network, but the domU systems are not directly accessible from outside, and traffic goes through some network address translation on the dom0.
These three networking nodes involve a number of interfaces with unusual names, such as vif*, veth*, peth* and xenbr0. The Xen hypervisor arranges them in whichever layout has been defined, under the control of the user-space tools. Since the NAT and routing models are only adapted to particular cases, we will only address the bridging model.
The standard configuration of the Xen packages does not change the system-wide network configuration. However, the xend daemon is configured to integrate virtual network interfaces into any pre-existing network bridge (with xenbr0 taking precedence if several such bridges exist). We must therefore set up a bridge in /etc/network/interfaces (which requires installing the bridge-utils package, which is why the xen-utils package recommends it) to replace the existing eth0 entry (be careful to use the correct network device name):
auto xenbr0
iface xenbr0 inet dhcp
    bridge_ports eth0
    bridge_maxwait 0
After rebooting to make sure the bridge is automatically created, we can now start the domU with the Xen control tools, in particular the xl command. This command allows different manipulations on the domains, including listing them and, starting/stopping them. You might need to increase the default memory by editing the variable memory from configuration file (in this case, /etc/xen/testxen.cfg). Here we have set it to 1024 (megabytes).
# xl list
Name                                        ID   Mem VCPUs	State	Time(s)
Domain-0                                     0  3918     2     r-----      35.1
# xl create /etc/xen/testxen.cfg
Parsing config from /etc/xen/testxen.cfg
# xl list
Name                                        ID   Mem VCPUs	State	Time(s)
Domain-0                                     0  2757     2     r-----      45.2
testxen                                      3  1024     1     r-----       1.3
Note that the testxen domU uses real memory taken from the RAM that would otherwise be available to the dom0, not simulated memory. Care should therefore be taken, when building a server meant to host Xen instances, to provision the physical RAM accordingly.
Voilà! Our virtual machine is starting up. We can access it in one of two modes. The usual way is to connect to it “remotely” through the network, as we would connect to a real machine; this will usually require setting up either a DHCP server or some DNS configuration. The other way, which may be the only way if the network configuration was incorrect, is to use the hvc0 console, with the xl console command:
# xl console testxen
[...]

Debian GNU/Linux 11 testxen hvc0

testxen login: 
One can then open a session, just like one would do if sitting at the virtual machine's keyboard. Detaching from this console is achieved through the Control+] key combination.
Once the domU is up, it can be used just like any other server (since it is a GNU/Linux system after all). However, its virtual machine status allows some extra features. For instance, a domU can be temporarily paused then resumed, with the xl pause and xl unpause commands. Note that even though a paused domU does not use any processor power, its allocated memory is still in use. It may be interesting to consider the xl save and xl restore commands: saving a domU frees the resources that were previously used by this domU, including RAM. When restored (or unpaused, for that matter), a domU doesn't even notice anything beyond the passage of time. If a domU was running when the dom0 is shut down, the packaged scripts automatically save the domU, and restore it on the next boot. This will of course involve the standard inconvenience incurred when hibernating a laptop computer, for instance; in particular, if the domU is suspended for too long, network connections may expire. Note also that Xen is so far incompatible with a large part of ACPI power management, which precludes suspending the host (dom0) system.
Halting or rebooting a domU can be done either from within the domU (with the shutdown command) or from the dom0, with xl shutdown or xl reboot.
Most of the xl subcommands expect one or more arguments, often a domU name. These arguments are well described in the xl(1) manual page.

12.2.2. LXC

Even though it is used to build “virtual machines”, LXC is not, strictly speaking, a virtualization system, but a system to isolate groups of processes from each other even though they all run on the same host. It takes advantage of a set of recent evolutions in the Linux kernel, collectively known as control groups, by which different sets of processes called “groups” have different views of certain aspects of the overall system. Most notable among these aspects are the process identifiers, the network configuration, and the mount points. Such a group of isolated processes will not have any access to the other processes in the system, and its accesses to the filesystem can be restricted to a specific subset. It can also have its own network interface and routing table, and it may be configured to only see a subset of the available devices present on the system.
These features can be combined to isolate a whole process family starting from the init process, and the resulting set looks very much like a virtual machine. The official name for such a setup is a “container” (hence the LXC moniker: LinuX Containers), but a rather important difference with “real” virtual machines such as provided by Xen or KVM is that there is no second kernel; the container uses the very same kernel as the host system. This has both pros and cons: advantages include excellent performance due to the total lack of overhead, and the fact that the kernel has a global vision of all the processes running on the system, so the scheduling can be more efficient than it would be if two independent kernels were to schedule different task sets. Chief among the inconveniences is the impossibility to run a different kernel in a container (whether a different Linux version or a different operating system altogether).
Since we are dealing with isolation and not plain virtualization, setting up LXC containers is more complex than just running debian-installer on a virtual machine. We will describe a few prerequisites, then go on to the network configuration; we will then be able to actually create the system to be run in the container.

12.2.2.1. Preliminary Steps

The lxc package contains the tools required to run LXC, and must therefore be installed.
LXC also requires the control groups configuration system, which is a virtual filesystem to be mounted on /sys/fs/cgroup. Since Debian 8 switched to systemd, which also relies on control groups, this is now done automatically at boot time without further configuration.

12.2.2.2. Network Configuration

The goal of installing LXC is to set up virtual machines; while we could, of course, keep them isolated from the network, and only communicate with them via the filesystem, most use cases involve giving at least minimal network access to the containers. In the typical case, each container will get a virtual network interface, connected to the real network through a bridge. This virtual interface can be plugged either directly onto the host's physical network interface (in which case the container is directly on the network), or onto another virtual interface defined on the host (and the host can then filter or route traffic). In both cases, the bridge-utils package will be required.
The simple case is just a matter of editing /etc/network/interfaces, moving the configuration for the physical interface (for instance, eth0 or enp1s0) to a bridge interface (usually br0), and configuring the link between them. For instance, if the network interface configuration file initially contains entries such as the following:
auto eth0
iface eth0 inet dhcp
They should be disabled and replaced with the following:
auto br0
iface br0 inet dhcp
    bridge-ports eth0
The effect of this configuration will be similar to what would be obtained if the containers were machines plugged into the same physical network as the host. The “bridge” configuration manages the transit of Ethernet frames between all the bridged interfaces, which includes the physical eth0 as well as the interfaces defined for the containers.
In cases where this configuration cannot be used (for instance, if no public IP addresses can be assigned to the containers), a virtual tap interface will be created and connected to the bridge. The equivalent network topology then becomes that of a host with a second network card plugged into a separate switch, with the containers also plugged into that switch. The host must then act as a gateway for the containers if they are meant to communicate with the outside world.
In addition to bridge-utils, this “rich” configuration requires the vde2 package; the /etc/network/interfaces file then becomes:
# Interface eth0 is unchanged
auto eth0
iface eth0 inet dhcp

# Virtual interface 
auto tap0
iface tap0 inet manual
    vde2-switch -t tap0

# Bridge for containers
auto br0
iface br0 inet static
    bridge-ports tap0
    address 10.0.0.1
    netmask 255.255.255.0
The network can then be set up either statically in the containers, or dynamically with DHCP server running on the host. Such a DHCP server will need to be configured to answer queries on the br0 interface.

12.2.2.3. Setting Up the System

Let us now set up the filesystem to be used by the container. Since this “virtual machine” will not run directly on the hardware, some tweaks are required when compared to a standard filesystem, especially as far as the kernel, devices and consoles are concerned. Fortunately, the lxc package includes scripts that mostly automate this configuration. For instance, the following commands (which require the debootstrap and rsync packages) will install a Debian container:
# lxc-create -n testlxc -t debian
debootstrap is /usr/sbin/debootstrap
Checking cache download in /var/cache/lxc/debian/rootfs-stable-amd64 ... 
Downloading debian minimal ...
I: Retrieving Release 
I: Retrieving Release.gpg 
[...]
Download complete.
Copying rootfs to /var/lib/lxc/testlxc/rootfs...
[...]
# 
Note that the filesystem is initially created in /var/cache/lxc, then moved to its destination directory. This allows creating identical containers much more quickly, since only copying is then required.
Note that the Debian template creation script accepts an --arch option to specify the architecture of the system to be installed and a --release option if you want to install something else than the current stable release of Debian. You can also set the MIRROR environment variable to point to a local Debian mirror.
The lxc package further creates a bridge interface lxcbr0, which by default is used by all newly created containers via /etc/lxc/default.conf and the lxc-net service:
lxc.net.0.type = veth
lxc.net.0.link = lxcbr0
lxc.net.0.flags = up
These entries mean, respectively, that a virtual interface will be created in every new container; that it will automatically be brought up when said container is started; and that it will be automatically connected to the lxcbr0 bridge on the host. You will find these settings in the created container's configuration (/var/lib/lxc/testlxc/config), where also the device' MAC address will be specified in lxc.net.0.hwaddr. Should this last entry be missing or disabled, a random MAC address will be generated.
Another useful entry in that file is the setting of the hostname:
lxc.uts.name = testlxc
The newly-created filesystem now contains a minimal Debian system and a network interface.

12.2.2.4. Starting the Container

Now that our virtual machine image is ready, let's start the container with lxc-start --name=testlxc.
In LXC releases following 2.0.8, root passwords are not set by default. We can set one running lxc-attach -n testlxc passwd if we want. We can login with:
# lxc-console -n testlxc
Connected to tty 1
Type <Ctrl+a q> to exit the console, <Ctrl+a Ctrl+a> to enter Ctrl+a itself

Debian GNU/Linux 11 testlxc tty1

testlxc login: root
Password: 
Linux testlxc 5.10.0-11-amd64 #1 SMP Debian 5.10.92-1 (2022-01-18) x86_64

The programs included with the Debian GNU/Linux system are free software;
the exact distribution terms for each program are described in the
individual files in /usr/share/doc/*/copyright.

Debian GNU/Linux comes with ABSOLUTELY NO WARRANTY, to the extent
permitted by applicable law.
Last login: Wed Mar  9 01:45:21 UTC 2022 on console
root@testlxc:~# ps auxwf
USER         PID %CPU %MEM    VSZ   RSS TTY      STAT START   TIME COMMAND
root           1  0.0  0.2  18964 11464 ?        Ss   01:36   0:00 /sbin/init
root          45  0.0  0.2  31940 10396 ?        Ss   01:37   0:00 /lib/systemd/systemd-journald
root          71  0.0  0.1  99800  5724 ?        Ssl  01:37   0:00 /sbin/dhclient -4 -v -i -pf /run/dhclient.eth0.pid [..]
root          97  0.0  0.1  13276  6980 ?        Ss   01:37   0:00 sshd: /usr/sbin/sshd -D [listener] 0 of 10-100 startups
root         160  0.0  0.0   6276  3928 pts/0    Ss   01:46   0:00 /bin/login -p --
root         169  0.0  0.0   7100  3824 pts/0    S    01:51   0:00  \_ -bash
root         172  0.0  0.0   9672  3348 pts/0    R+   01:51   0:00      \_ ps auxwf
root         164  0.0  0.0   5416  2128 pts/1    Ss+  01:49   0:00 /sbin/agetty -o -p -- \u --noclear [...]
root@testlxc:~# 
We are now in the container; our access to the processes is restricted to only those started from the container itself, and our access to the filesystem is similarly restricted to the dedicated subset of the full filesystem (/var/lib/lxc/testlxc/rootfs). We can exit the console with Control+a q.
Note that we ran the container as a background process, thanks to lxc-start starting using the --daemon option by default. We can interrupt the container with a command such as lxc-stop --name=testlxc.
The lxc package contains an initialization script that can automatically start one or several containers when the host boots (it relies on lxc-autostart which starts containers whose lxc.start.auto option is set to 1). Finer-grained control of the startup order is possible with lxc.start.order and lxc.group: by default, the initialization script first starts containers which are part of the onboot group and then the containers which are not part of any group. In both cases, the order within a group is defined by the lxc.start.order option.

12.2.3. Virtualization with KVM

KVM, which stands for Kernel-based Virtual Machine, is first and foremost a kernel module providing most of the infrastructure that can be used by a virtualizer, but it is not a virtualizer by itself. Actual control for the virtualization is handled by a QEMU-based application. Don't worry if this section mentions qemu-* commands: it is still about KVM.
Unlike other virtualization systems, KVM was merged into the Linux kernel right from the start. Its developers chose to take advantage of the processor instruction sets dedicated to virtualization (Intel-VT and AMD-V), which keeps KVM lightweight, elegant and not resource-hungry. The counterpart, of course, is that KVM doesn't work on any computer but only on those with appropriate processors. For x86-based computers, you can verify that you have such a processor by looking for “vmx” or “svm” in the CPU flags listed in /proc/cpuinfo.
With Red Hat actively supporting its development, KVM has more or less become the reference for Linux virtualization.

12.2.3.1. Preliminary Steps

Unlike such tools as VirtualBox, KVM itself doesn't include any user-interface for creating and managing virtual machines. The virtual qemu-kvm package only provides an executable able to start a virtual machine, as well as an initialization script that loads the appropriate kernel modules.
Fortunately, Red Hat also provides another set of tools to address that problem, by developing the libvirt library and the associated virtual machine manager tools. libvirt allows managing virtual machines in a uniform way, independently of the virtualization system involved behind the scenes (it currently supports QEMU, KVM, Xen, LXC, OpenVZ, VirtualBox, VMWare, and UML). virt-manager is a graphical interface that uses libvirt to create and manage virtual machines.
We first install the required packages, with apt-get install libvirt-clients libvirt-daemon-system qemu-kvm virtinst virt-manager virt-viewer. libvirt-daemon-system provides the libvirtd daemon, which allows (potentially remote) management of the virtual machines running of the host, and starts the required VMs when the host boots. libvirt-clients provides the virsh command-line tool, which allows controlling the libvirtd-managed machines.
The virtinst package provides virt-install, which allows creating virtual machines from the command line. Finally, virt-viewer allows accessing a VM's graphical console.

12.2.3.2. Network Configuration

Just as in Xen and LXC, the most frequent network configuration involves a bridge grouping the network interfaces of the virtual machines (see Secțiune 12.2.2.2, „Network Configuration”).
Alternatively, and in the default configuration provided by KVM, the virtual machine is assigned a private address (in the 192.168.122.0/24 range), and NAT is set up so that the VM can access the outside network.
The rest of this section assumes that the host has an eth0 physical interface and a br0 bridge, and that the former is connected to the latter.

12.2.3.3. Installation with virt-install

Creating a virtual machine is very similar to installing a normal system, except that the virtual machine's characteristics are described in a seemingly endless command line.
Practically speaking, this means we will use the Debian installer, by booting the virtual machine on a virtual DVD-ROM drive that maps to a Debian DVD image stored on the host system. The VM will export its graphical console over the VNC protocol (see Secțiune 9.2.2, „Using Remote Graphical Desktops” for details), which will allow us to control the installation process.
We first need to tell libvirtd where to store the disk images, unless the default location (/var/lib/libvirt/images/) is fine.
# mkdir /srv/kvm
# virsh pool-create-as srv-kvm dir --target /srv/kvm
Pool srv-kvm created

# 
Let us now start the installation process for the virtual machine, and have a closer look at virt-install's most important options. This command registers the virtual machine and its parameters in libvirtd, then starts it so that its installation can proceed.
# virt-install --connect qemu:///system  1
               --virt-type kvm           2
               --name testkvm            3
               --memory 2048             4
               --disk /srv/kvm/testkvm.qcow,format=qcow2,size=10  5
               --cdrom /srv/isos/debian-11.2.0-amd64-netinst.iso  6
               --network bridge=virbr0   7
               --graphics vnc            8
               --os-type linux           9
               --os-variant debiantesting


Starting install...
Allocating 'testkvm.qcow'

1

The --connect option specifies the “hypervisor” to use. Its form is that of an URL containing a virtualization system (xen://, qemu://, lxc://, openvz://, vbox://, and so on) and the machine that should host the VM (this can be left empty in the case of the local host). In addition to that, and in the QEMU/KVM case, each user can manage virtual machines working with restricted permissions, and the URL path allows differentiating “system” machines (/system) from others (/session).

2

Since KVM is managed the same way as QEMU, the --virt-type kvm allows specifying the use of KVM even though the URL looks like QEMU.

3

The --name option defines a (unique) name for the virtual machine.

4

The --memory option allows specifying the amount of RAM (in MB) to allocate for the virtual machine.

5

The --disk specifies the location of the image file that is to represent our virtual machine's hard disk; that file is created, unless present, with a size (in GB) specified by the size parameter. The format parameter allows choosing among several ways of storing the image file. The default format (qcow2) allows starting with a small file that only grows when the virtual machine starts actually using space.

6

The --cdrom option is used to indicate where to find the optical disk to use for installation. The path can be either a local path for an ISO file, an URL where the file can be obtained, or the device file of a physical CD-ROM drive (i.e. /dev/cdrom).

7

The --network specifies how the virtual network card integrates in the host's network configuration. The default behavior (which we explicitly forced in our example) is to integrate it into any pre-existing network bridge. If no such bridge exists, the virtual machine will only reach the physical network through NAT, so it gets an address in a private subnet range (192.168.122.0/24).
The default network configuration, which contains the definition for a virbr0 bridge interface, can be edited using virsh net-edit default and started via virsh net-start default if not already done automatically during system start.

8

--graphics vnc states that the graphical console should be made available using VNC. The default behavior for the associated VNC server is to only listen on the local interface; if the VNC client is to be run on a different host, establishing the connection will require setting up an SSH tunnel (see Secțiune 9.2.1.4, „Creating Encrypted Tunnels with Port Forwarding”). Alternatively, --graphics vnc,listen=0.0.0.0 can be used so that the VNC server is accessible from all interfaces; note that if you do that, you really should design your firewall accordingly.

9

The --os-type and --os-variant options allow optimizing a few parameters of the virtual machine, based on some of the known features of the operating system mentioned there.
The full list of OS types can be shown using the osinfo-query os command from the libosinfo-bin package.
At this point, the virtual machine is running, and we need to connect to the graphical console to proceed with the installation process. If the previous operation was run from a graphical desktop environment, this connection should be automatically started. If not, or if we operate remotely, 
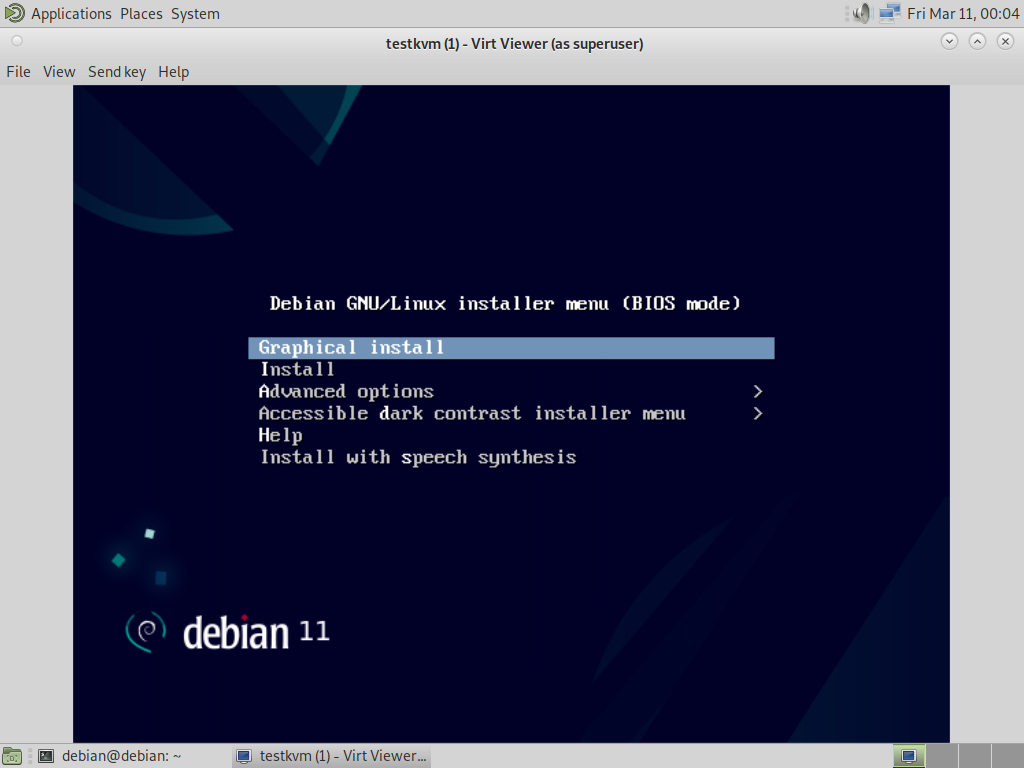
virt-viewer can be run from any graphical environment to open the graphical console (note that the root password of the remote host is asked twice because the operation requires 2 SSH connections):
$ virt-viewer --connect qemu+ssh://root@server/system testkvm
root@server's password: 
Connecting to installer session using virt-viewer

Fig. 12.1. Connecting to installer session using virt-viewer

When the installation process ends, the virtual machine is restarted, now ready for use.

12.2.3.4. Managing Machines with virsh

Now that the installation is done, let us see how to handle the available virtual machines. The first thing to try is to ask libvirtd for the list of the virtual machines it manages:
# virsh -c qemu:///system list --all
 Id Name                 State
----------------------------------
  8 testkvm              shut off
Let's start our test virtual machine:
# virsh -c qemu:///system start testkvm
Domain testkvm started
We can now get the connection instructions for the graphical console (the returned VNC display can be given as parameter to vncviewer):
# virsh -c qemu:///system vncdisplay testkvm
127.0.0.1:0
Other available virsh subcommands include:
  • reboot to restart a virtual machine;
  • shutdown to trigger a clean shutdown;
  • destroy, to stop it brutally;
  • suspend to pause it;
  • resume to unpause it;
  • autostart to enable (or disable, with the --disable option) starting the virtual machine automatically when the host starts;
  • undefine to remove all traces of the virtual machine from libvirtd.
All these subcommands take a virtual machine identifier as a parameter.