4.2. Installing, Step by Step
4.2.1. Booting and Starting the Installer
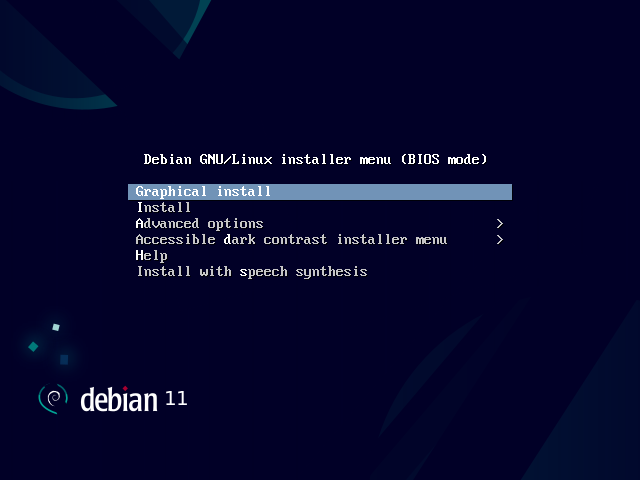
Once the BIOS has begun booting from the CD- or DVD-ROM, the Isolinux bootloader menu appears. At this stage, the Linux kernel is not yet loaded; this menu allows you to choose the kernel to boot and enter possible parameters to be transferred to it in the process.
For a standard installation, you only need to choose “Install” or “Graphical install” (with the arrow keys), then press the Enter key to initiate the remainder of the installation process. If the DVD-ROM is a “Multi-arch” disk, and the machine has an Intel or AMD 64-bit processor, those menu options enable the installation of the 64-bit variant (amd64) and the installation of the 32-bit variant remains available in a dedicated sub-menu (“32-bit install options”). If you have a 32-bit processor, you don't get a choice and the menu entries install the 32-bit variant (i386).
Each menu entry hides a specific boot command line, which can be configured as needed by pressing the TAB key before validating the entry and booting. The “Help” menu entry displays the old command line interface, where the F1 to F10 keys display different help screens detailing the various options available at the prompt. You will rarely need to use this option except in very specific cases.
The “expert” mode (accessible in the “Advanced options” menu) details all possible options in the process of installation, and allows navigation between the various steps without them happening automatically in sequence. Be careful, this very verbose mode can be confusing due to the multitude of configuration choices that it offers.
The "rescue" mode, also accessible in the “Advanced options” menu, allows to recover a broken system or fix the bootloader. After presenting the first few screens of the installer, it will allow to enter a shell prompt in the file system you selected to perform any necessary actions, or allow to re-install the bootloader.
Once booted, the installation program guides you step by step throughout the process. This section presents each of these steps in detail. Here we follow the process of an installation from an amd64 DVD-ROM (more specifically, the RC3 version of the installer for Bullseye); netinst installations, as well as the final release of the installer, may look slightly different. We will also address installation in graphical mode, but the only difference from “classic” (text-mode) installation is in the visual appearance.
4.2.2. Selecting the language
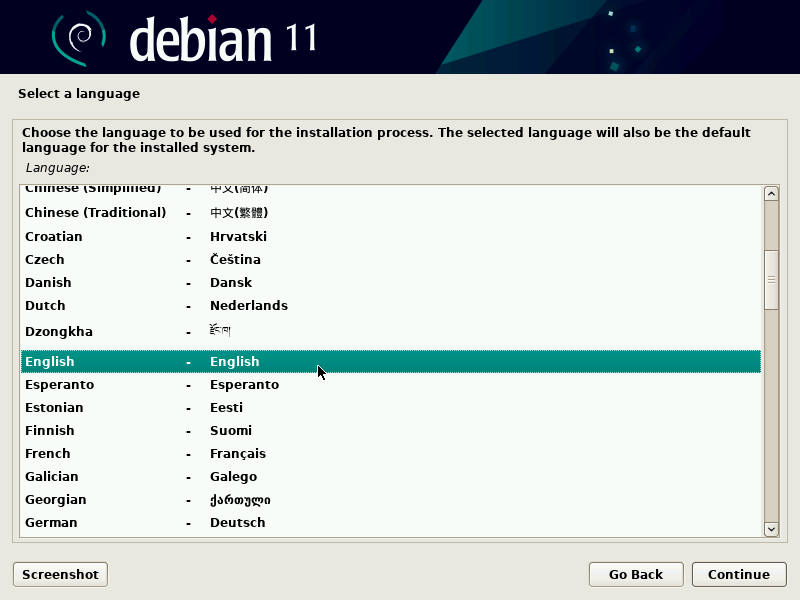
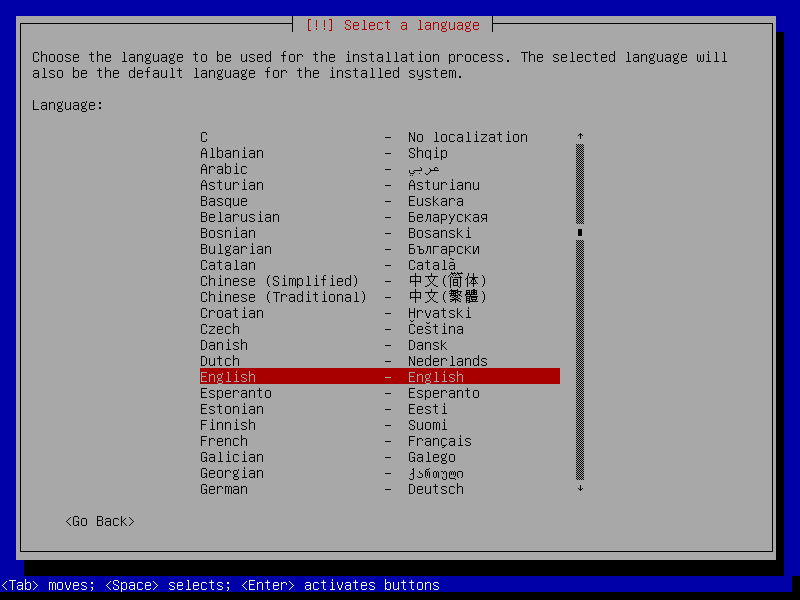
The installation program begins in English, but the first step allows the user to choose the language that will be used in the rest of the process. Choosing French, for example, will provide an installation entirely translated into French (and a system configured in French as a result). This choice is also used to define more relevant default choices in subsequent stages (notably the keyboard layout).
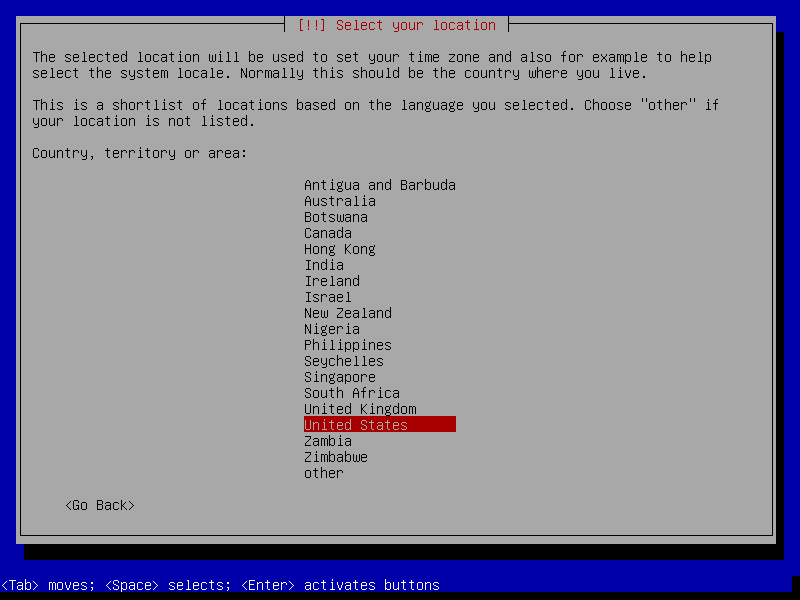
4.2.3. Selecting the country
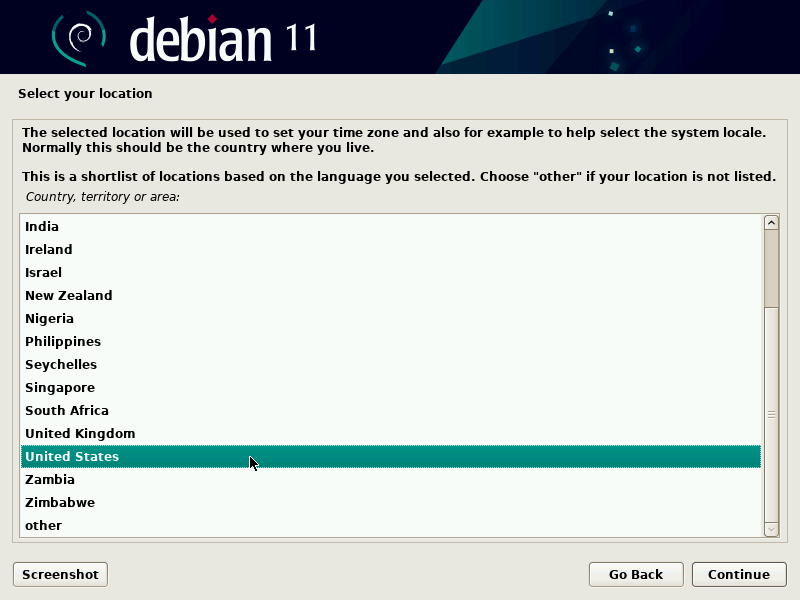
The second step consists in choosing your country. Combined with the language, this information enables the program to offer the most appropriate keyboard layout. This will also influence the configuration of the time zone. In the United States, a standard QWERTY keyboard is suggested, and a choice of appropriate time zones is offered.
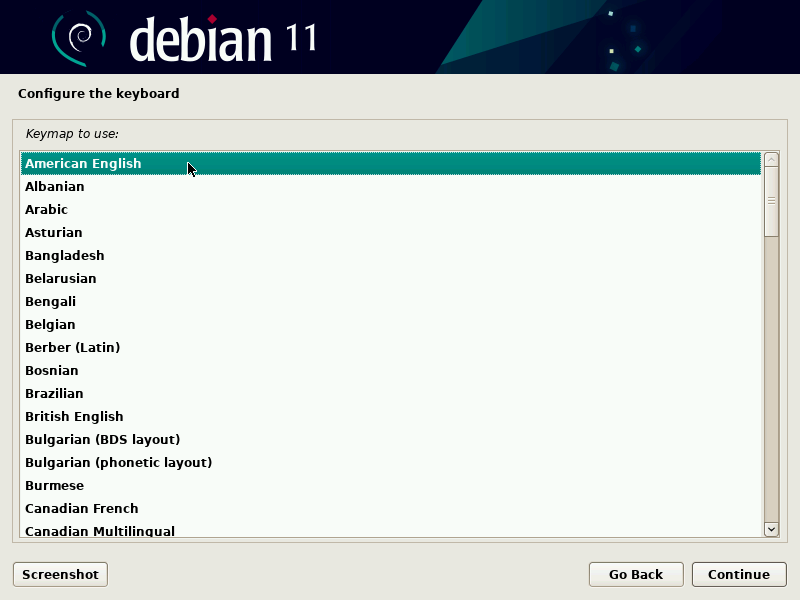
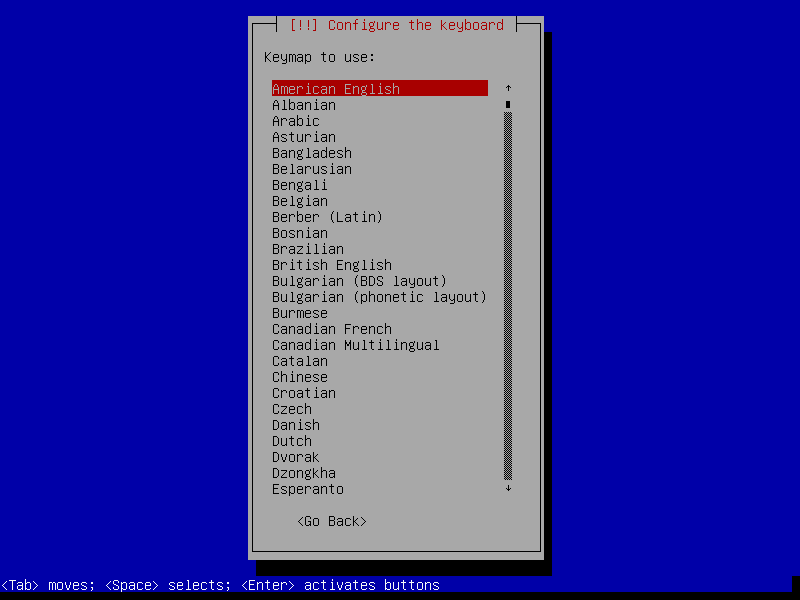
4.2.4. Selecting the keyboard layout
The proposed “American English” keyboard corresponds to the usual QWERTY layout.
4.2.5. Detecting Hardware
This step is completely automatic in the vast majority of cases. The installer detects your hardware, and tries to identify the CD-ROM drive used in order to access its content. It loads the modules corresponding to the various hardware components detected, and then “mounts” the CD-ROM in order to read it. The previous steps were completely contained in the boot image included on the CD, a file of limited size and loaded into memory by the BIOS when booting from the CD.
The installer can work with the vast majority of drives, especially standard ATAPI peripherals (sometimes called IDE and EIDE). However, if detection of the CD-ROM reader fails, the installer offers the choice to load a kernel module (for instance, from a USB key) corresponding to the CD-ROM driver.
4.2.6. Loading Components
With the contents of the CD now available, the installer loads all the files necessary to continue with its work. This includes additional drivers for the remaining hardware (especially the network card), as well as all the components of the installation program.
4.2.7. Detecting Network Hardware
This automatic step tries to identify the network card and load the corresponding module. If automatic detection fails, you can manually select the module to load. If no module works, it is possible to load a specific module from a removable device. This last solution is usually only needed if the appropriate driver is not included in the standard Linux kernel, but available elsewhere, such as the manufacturer's website or in firmware archives/packages.
This step must absolutely be successful for netinst installations, since the Debian packages must be loaded from the network.
4.2.8. Configuring the Network
In order to automate the process as much as possible, the installer attempts an automatic network configuration by DHCP (for IPv4) and by IPv6 network discovery. If this fails, it offers more choices: try again with a normal DHCP configuration, attempt DHCP configuration by declaring the name of the machine, or set up a static network configuration.
This last option requires an IP address, a subnet mask, an IP address for a potential gateway, a machine name, and a domain name.
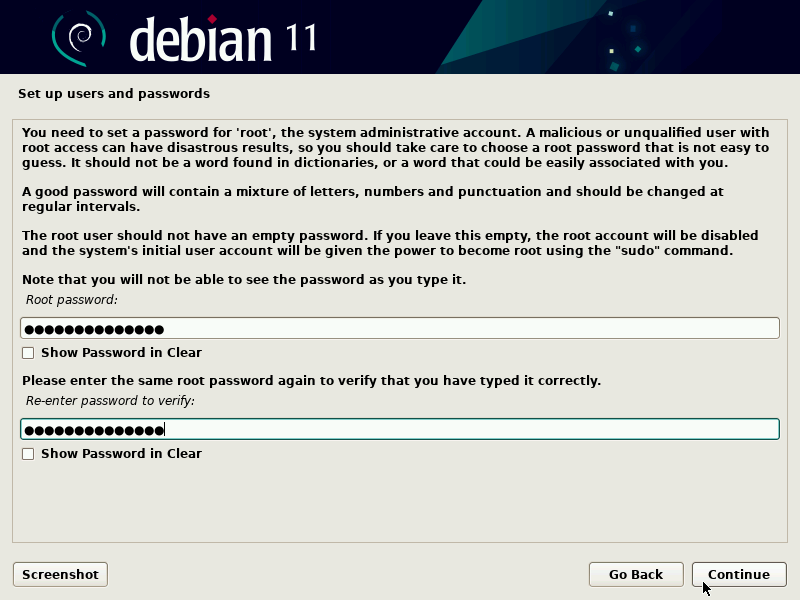
4.2.9. Administrator Password
The super-user root account, reserved for the machine's administrator, is automatically created during installation; this is why a password is requested. The installer also asks for a confirmation of the password to prevent any input error, which would later be difficult to amend. Note that you can leave both fields empty if you want the root account to be disabled. In that case, the login for the root user will be deactivated and the first regular user — that will be created by the installer in the next step — will have administrative rights through
sudo (see
Section 8.9.4, “Sharing Administrator Rights”).
4.2.10. Creating the First User
Debian also imposes the creation of a standard user account so that the administrator doesn't get into the bad habit of working as root. The precautionary principle essentially means that each task is performed with the minimum required rights, in order to limit the damage caused by human error. This is why the installer will ask for the complete name of this first user, their username, and their password (twice, to prevent the risk of erroneous input).
4.2.11. Configuring the Clock
If the network is available, the system's internal clock is updated (in a one-shot way) from an NTP server. This way the timestamps on logs will be correct from the first boot. For them to remain consistently precise over time, an NTP daemon needs to be set up after initial installation (see
Section 8.9.2, “Time Synchronization”).
4.2.12. Detecting Disks and Other Devices
This step automatically detects the hard drives on which Debian may be installed. They will be presented in the next step: partitioning.
4.2.13. Starting the Partitioning Tool
The partitioning step is traditionally difficult for new users. It is necessary to define the various portions of the disks (or “partitions”) on which the Linux filesystems and virtual memory (swap) will be stored. This task is complicated if another operating system that you want to keep is already on the machine. Indeed, you will then have to make sure that you do not alter its partitions (or that you resize them without causing damage).
Fortunately, the partitioning software has a “guided” mode which recommends partitions for the user to make — in most cases, you can simply validate the software's suggestions.
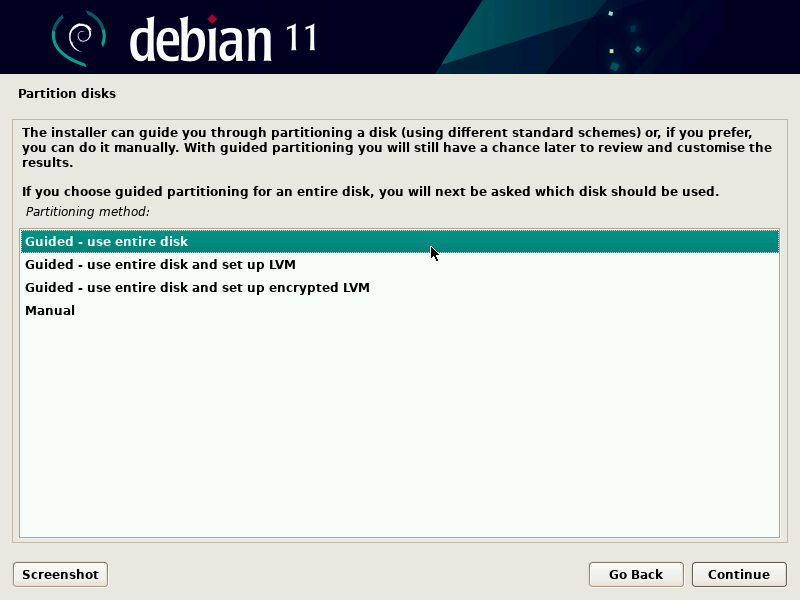
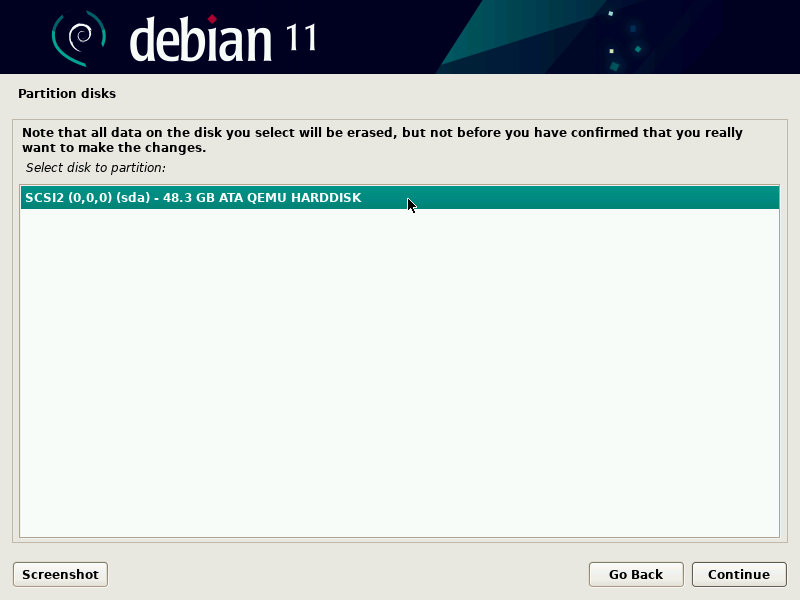
The first screen in the partitioning tool offers the choice of using an entire hard drive to create various partitions. For a (new) computer which will solely use Linux, this option is clearly the simplest, and you can choose the option “Guided - use entire disk”. If the computer has two hard drives for two operating systems, setting one drive for each is also a solution that can facilitate partitioning. In both of these cases, the next screen offers to choose the disk where Linux will be installed by selecting the corresponding entry (for example, “SCSI1 (0,0,0) (sda) - 53.7 GB ATA QEMU HARDDISK”). You then start guided partitioning.
Guided partitioning can also set up LVM logical volumes instead of partitions (see below). Since the remainder of the operation is the same, we will not go over the option “Guided - use entire disk and set up LVM” (encrypted or not).
In other cases, when Linux must work alongside other already existing partitions, you need to choose manual partitioning.
4.2.13.1. Guided partitioning
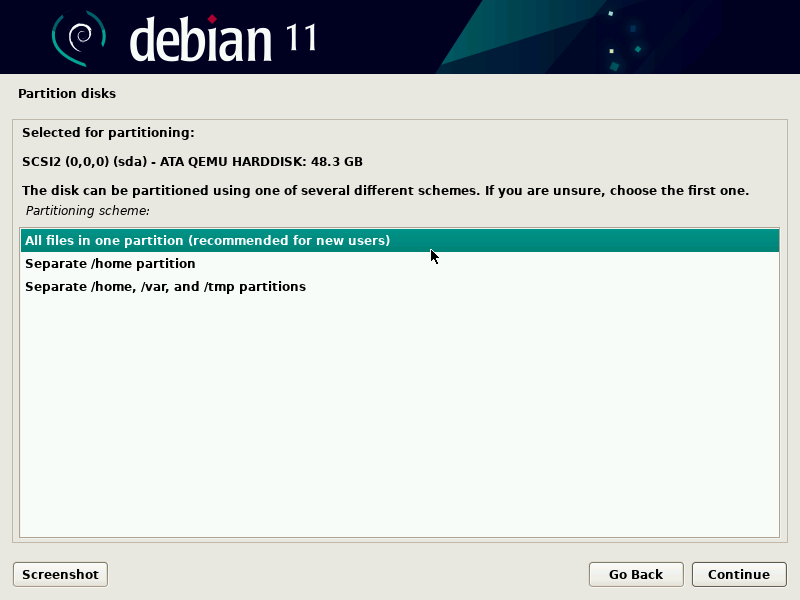
The guided partitioning tool offers three partitioning methods, which correspond to different usages.
The first method is called “All files in one partition”. The entire Linux system tree is stored in a single filesystem, corresponding to the root / directory. This simple and robust partitioning fits perfectly for personal or single-user systems. In fact, two partitions will be created: the first will house the complete system, the second the virtual memory (swap).
The second method, “Separate /home partition”, is similar, but splits the file hierarchy in two: one partition contains the Linux system (/), and the second contains “home directories” (meaning user data, in files and subdirectories available under /home/).
The last partitioning method, called “Separate /home, /var, and /tmp partitions”, is appropriate for servers and multi-user systems. It divides the file tree into many partitions: in addition to the root (/) and user accounts (/home/) partitions, it also has partitions for server software data (/var/), and temporary files (/tmp/). These divisions have several advantages. Users can not lock up the server by consuming all available hard drive space (they can only fill up /tmp/ and /home/). The daemon data (especially logs) can no longer clog up the rest of the system.
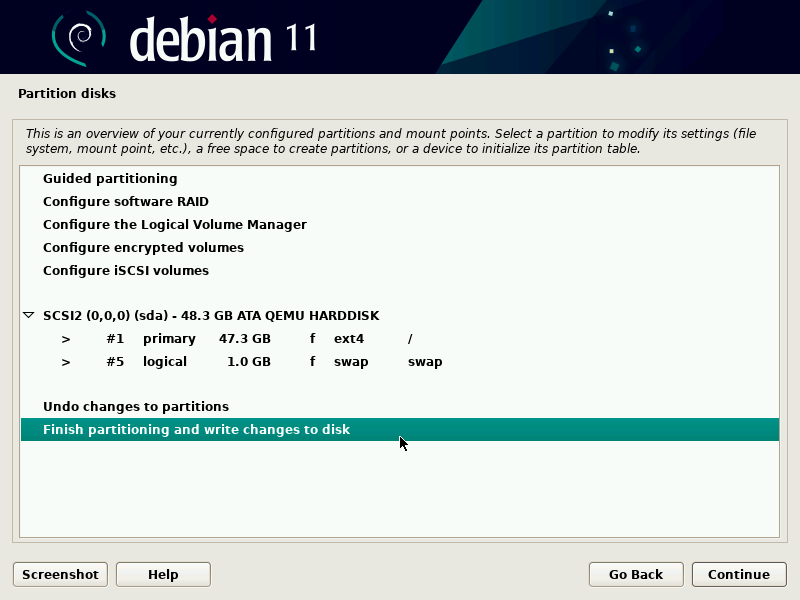
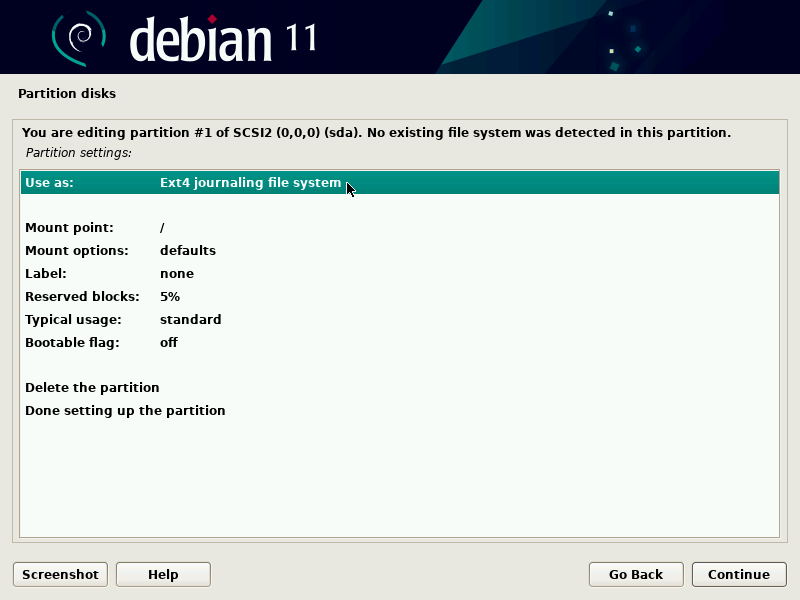
After choosing the type of partition, the software calculates a suggestion, and describes it on the screen; the user can then modify it if needed. You can, in particular, choose another filesystem if the standard choice (ext4) isn't appropriate. In most cases, however, the proposed partitioning is reasonable and it can be accepted by selecting the “Finish partitioning and write changes to disk” entry.
4.2.13.2. Manual Partitioning
Manual partitioning allows greater flexibility, allowing the user to choose the purpose and size of each partition. Furthermore, this mode is unavoidable if you wish to use software RAID.
The first screen displays the available disks, their partitions, and any possible free space that has not yet been partitioned. You can select each displayed element; pressing the Enter key then gives a list of possible actions.
You can erase all partitions on a disk by selecting it.
When selecting free space on a disk, you can manually create a new partition. You can also do this with guided partitioning, which is an interesting solution for a disk that already contains another operating system, but which you may wish to partition for Linux in a standard manner. See
Section 4.2.13.1, “Guided partitioning” for more details on guided partitioning.
When choosing a partition, you can indicate the manner in which you are going to use it:
format it and include it in the file tree by choosing a mount point;
use it as a swap partition;
make it into a “physical volume for encryption” (to protect the confidentiality of data on certain partitions, see below);
make it a “physical volume for LVM” (this concept is discussed in greater detail later in this chapter);
use it as a RAID device (see later in this chapter);
you can also choose not to use it, and therefore leave it unchanged.
4.2.13.3. Configuring Multidisk Devices (Software RAID)
Some types of RAID allow the duplication of information stored on hard drives to prevent data loss in the event of a hardware problem affecting one of them. Level 1 RAID keeps a simple, identical copy (mirror) of a hard drive on another drive, while level 5 or 6 RAID splits redundant data over several disks, thus allowing the complete reconstruction of a failing drive.
We will only describe level 1 RAID, which is the simplest to implement. The first step involves creating two partitions of identical size located on two different hard drives, and to label them “physical volume for RAID”.
You must then choose “Configure software RAID” in the partitioning tool to combine these two partitions into a new virtual disk and select “Create MD device” in the configuration screen. You then need to answer a series of questions about this new device. The first question asks about the RAID level to use, which in our case will be “RAID1”. The second question asks about the number of active devices — two in our case, which is the number of partitions that need to be included in this MD device. The third question is about the number of spare devices — 0; we have not planned any additional disk to take over for a possible defective disk. The last question requires you to choose the partitions for the RAID device — these would be the two that we have set aside for this purpose (make sure you only select the partitions that explicitly mention “raid”).
Back to the main menu, a new virtual “RAID” disk appears. This disk is presented with a single partition which can not be deleted, but whose use we can choose (just like for any other partition).
4.2.13.4. Configuring the Logical Volume Manager (LVM)
LVM allows you to create “virtual” partitions that span over several disks. The benefits are twofold: the size of the partitions are no longer limited by individual disks but by their cumulative volume, and you can resize existing partitions at any time, possibly after adding an additional disk when needed.
LVM uses a particular terminology: a virtual partition is a “logical volume”, which is part of a “volume group”, or an association of several “physical volumes”. Each of these terms in fact corresponds to a “real” partition (or a software RAID device).
This technique works in a very simple way: each volume, whether physical or logical, is split into blocks of the same size, which are made to correspond by LVM. The addition of a new disk will cause the creation of a new physical volume, and these new blocks can be associated to any volume group. All of the partitions in the volume group that is thus expanded will have additional space into which they can extend.
The partitioning tool configures LVM in several steps. First you must create on the existing disks the partitions that will be “physical volumes for LVM”. To activate LVM, you need to choose “Configure the Logical Volume Manager (LVM)”, then on the same configuration screen “Create a volume group”, to which you will associate the existing physical volumes. Finally, you can create logical volumes within this volume group. Note that the automatic partitioning system can perform all these steps automatically.
In the partitioning menu, each physical volume will appear as a disk with a single partition which can not be deleted, but that you can use as desired.
4.2.13.5. Setting Up Encrypted Partitions
To guarantee the confidentiality of your data, for instance in the event of the loss or theft of your computer or a hard drive, it is possible to encrypt the data on some partitions. This feature can be added underneath any filesystem, since, as for LVM, Linux (and more particularly the dm-crypt driver) uses the Device Mapper to create a virtual partition (whose content is protected) based on an underlying partition that will store the data in an encrypted form (thanks to LUKS, Linux Unified Key Setup, a standard format that enables the storage of encrypted data as well as meta-information that indicates the encryption algorithms used).
To create an encrypted partition, you must first assign an available partition for this purpose. To do so, select a partition and indicate that it is to be used as a “physical volume for encryption”. After partitioning the disk containing the physical volume to be made, choose “Configure encrypted volumes”. The software will then propose to initialize the physical volume with random data (making the localization of the real data more difficult), and will ask you to enter an “encryption passphrase”, which you will have to enter every time you boot your computer in order to access the content of the encrypted partition. Once this step has been completed, and you have returned to the partitioning tool menu, a new partition will be available in an “encrypted volume”, which you can then configure just like any other partition. In most cases, this partition is used as a physical volume for LVM so as to protect several partitions (LVM logical volumes) with the same encryption key, including the swap partition (see sidebar
SECURITY Encrypted swap partition).
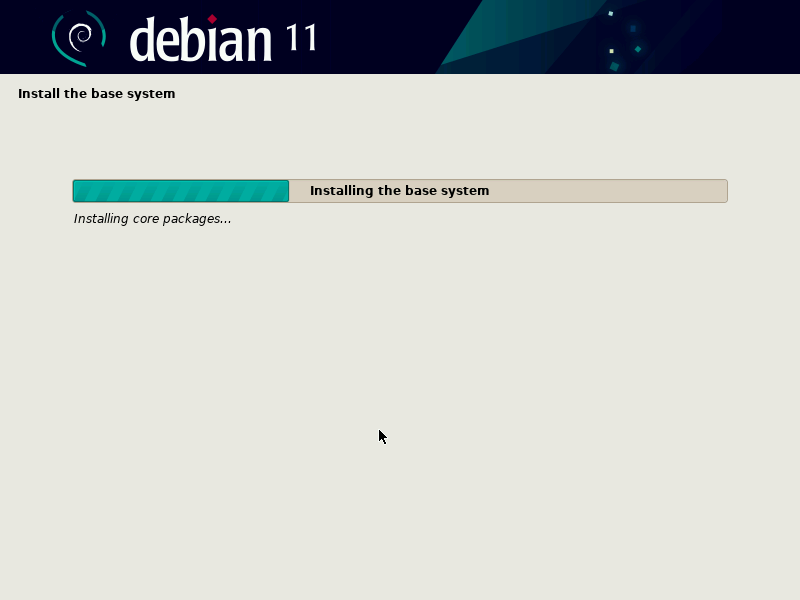
4.2.14. Installing the Base System
This step, which doesn't require any user interaction, installs the Debian “base system” packages. This includes the dpkg and apt tools, which manage Debian packages, as well as the utilities necessary to boot the system and start using it.
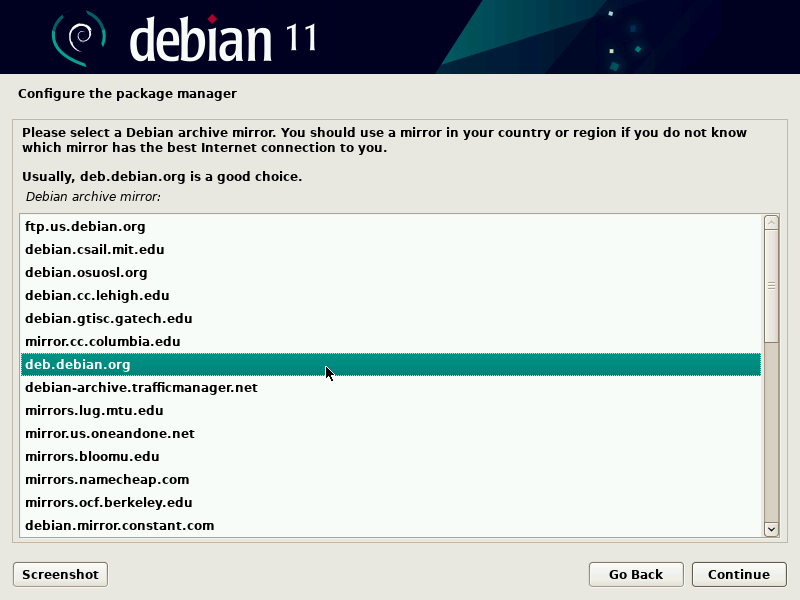
4.2.15. Configuring the Package Manager (apt)
In order to be able to install additional software, APT needs to be configured and told where to find Debian packages. This step is as automated as possible.
If getting packages from the network is requested, the installer allows to choose a server from which to download these packages, by choosing first a country, then a mirror available in that country. A mirror is a public server hosting copies of all the files of the Debian master archive.
Finally, the program proposes to use an HTTP proxy. If there is no proxy, Internet access will be direct. If you type http://proxy.falcot.com:3128, APT will use the Falcot proxy/cache, a “Squid” program. You can find these settings by checking the configurations of a web browser on another machine connected to the same network.
The files Packages.xz and Sources.xz are then automatically downloaded to update the list of packages recognized by APT.
4.2.16. Debian Package Popularity Contest
The Debian system contains a package called popularity-contest, whose purpose is to compile package usage statistics. Each week, this program collects information on the packages installed and those used recently, and anonymously sends this information to the Debian project servers. The project can then use this information to determine the relative importance of each package, which influences the priority that will be granted to them. In particular, the most “popular” packages will be included in the installation CD-ROM, which will facilitate their access for users who do not wish to download them or to purchase a complete set.
This package is only activated on demand, out of respect for the confidentiality of users' usage.
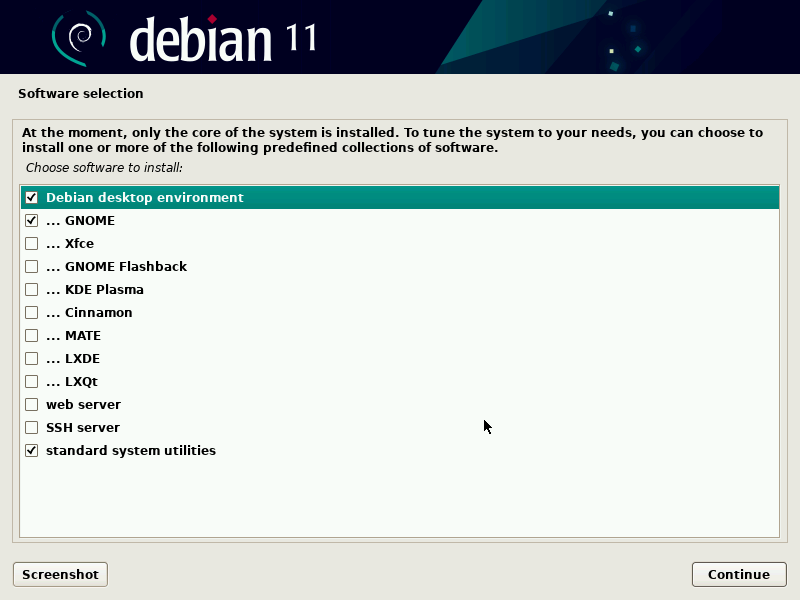
4.2.17. Selecting Packages for Installation
The following step allows you to choose the purpose of the machine in very broad terms; the twelve suggested tasks correspond to lists of packages to be installed. The list of the packages that will actually be installed will be fine-tuned and completed later on, but this provides a good starting point in a simple manner.
This step can require a full set of installation media or an internet connection and a working mirror setup as described above.
Some packages are also automatically installed according to the hardware detected (thanks to the program discover-pkginstall from the discover package).
4.2.18. Installing the GRUB Bootloader
The bootloader is the first program started by the BIOS. This program loads the Linux kernel into memory and then executes it. It often offers a menu that allows the user to choose the kernel to load and/or the operating system to boot.
By default, the menu proposed by GRUB contains all the installed Linux kernels, as well as any other operating systems that were detected. This is why you should accept the offer to install it in the Master Boot Record. Since keeping older kernel versions preserves the ability to boot the same system if the most recently installed kernel is defective or poorly adapted to the hardware, it often makes sense to keep a few older kernel versions installed.
GRUB is the default bootloader installed by Debian thanks to its technical superiority: it works with most filesystems and therefore doesn't require an update after each installation of a new kernel, since it reads its configuration during boot and finds the exact position of the new kernel. Version 1 of GRUB (now known as “Grub Legacy”) couldn't handle all combinations of LVM and software RAID; version 2, installed by default, is more complete. While there may still be situations where it is preferable to install LILO (another bootloader); the Debian installer does no longer support the installation of it.
It is worth noting that GRUB is not a single bootloader, it is more like a collection of bootloaders suited for different cases. The numerous binary packages built out of the GRUB source package reflect that: grub-efi-amd64 is for 64-bit PC booting in UEFI mode, grub-efi-ia32 is for 32-bit PC booting in UEFI mode, grub-pc is for PC booting in BIOS mode, grub-uboot for ARM computers, etc.
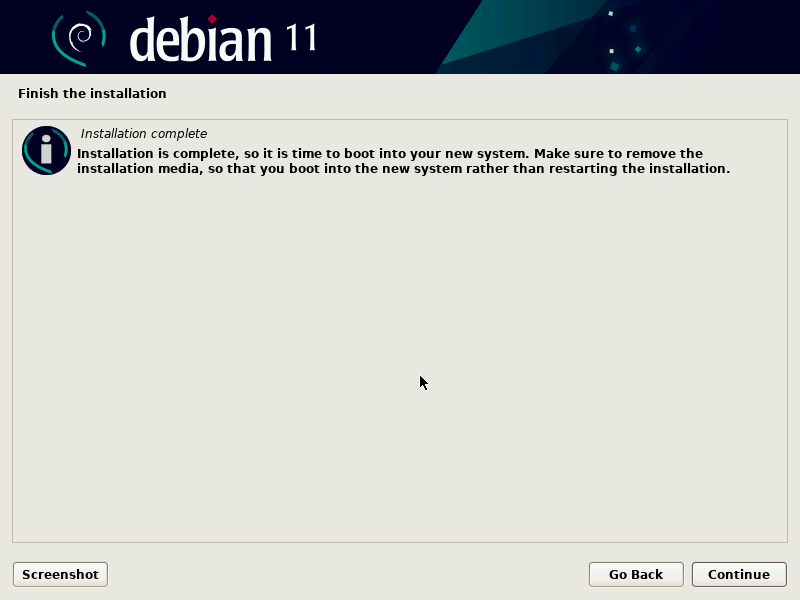
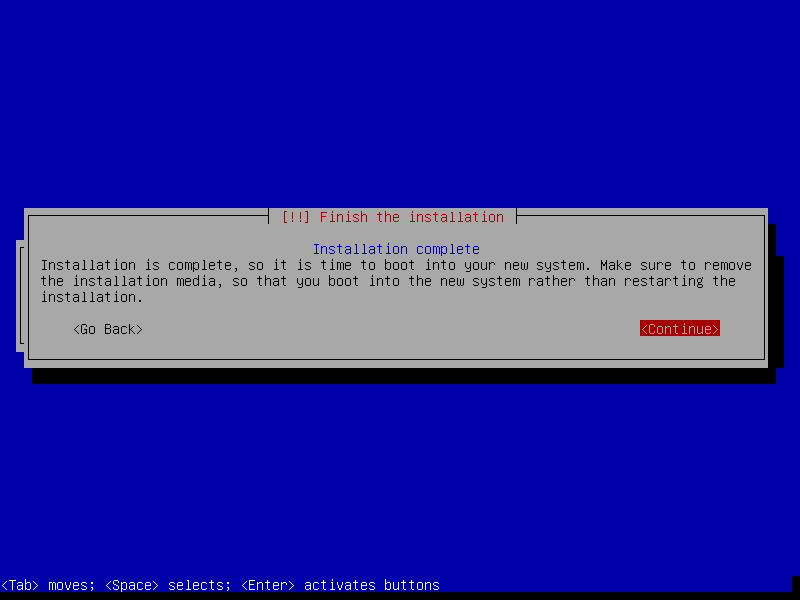
4.2.19. Finishing the Installation and Rebooting
The installation is now complete, the program invites you to remove the CD-ROM from the reader and to restart the computer.